This project cost me $0 at the time. I had everything I needed laying around the house. There's always something you can do with those extra scraps of stuff laying around. I never throw any fabric or interfacing away because you never know what you can make out of it!!! {thanks Pinterest}
Materials Needed:
1. 3 pieces of fabric that are 10x11inch –contrasting,
coordinating or all the same
{I used contrasting because I used scraps that I had}
one piece for lining, one piece for the top, and one
piece for your brush pocket
2. 1 9.25×10.25 piece of interfacing {whatever kind you
have on hand...I had fusable so thats what I used. I would suggest using a
lighter weight interfacing than I used because it was hard to roll up at the
end}
3. 16-17 inches of ribbon {I used bias tape because it's
what I had on hand. If I made another one, I would definitely buy some good
ribbon}
4. Scissors
5. Ruler
6. Iron
7. Straight Pins
8. Sewing Machine
Cut out all your necessary pieces of fabric and interfacing. Like I said in the materials needed, I would use a smaller guage than what I used because it was hard to roll up the fabric at the end and it also made the pockets a little tight.
Then fuse (iron or sew) the interfacing onto the back of what will be the inside of your case. You should have a little bit of extra fabric hanging out the side. My pieces are sort of "pieced" together because I didn't have one big piece.
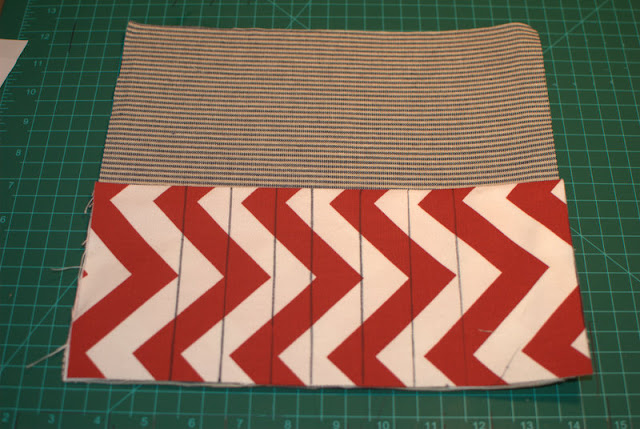
Now it's time to mark out where your pockets are going to be. As I say in all my tutorials...please, please, please don't use black sharpie to draw your lines on. I just do this for tutorial purposes only! I also used a zig zag white stitch so you could see where I had stitched.
Your measurements will be 2" for the big pockets {one on each end} and 1" for the smaller pockets. Remember to leave a 1/2" seam allowance on the outside edges so you will measure in a total of 2 1/2" from each side if you start your big pockets on the outside. I suggest this because its easier to roll the smaller brushes up in the middle.
Line your pocket up with your inside lining piece and pin in place
Stitch your along your pocket lines. You don't have to sew around the outside edge, because you will do this when you sew the whole thing together. That way you won't have two stitch lines at the end.
Time to add your ribbon which will hold the case closed. It doesn't really matter which side you put it on. Take your outside piece and place it right side up. Fold your ribbon in half and place the folded edge on which ever side you want it on about 4" from the bottom edge.
Then, place your lining piece pocket side down facing the right side of your outside piece and pin in place.
Use 1/2" seam allowance and sew your pieces together. Remember this should be sewn inside out.
Again, I drew the seam allowance on so you could see where it should be.
This is what you should have after your flip it around. As you can see in this picture my interfacing made it a little bulky.
Tuck in your open edges where you flipped the case right side out.
Iron your piece flat
Top stitch the whole way around the case using 1/4" seam allowance.
Fold down your top pice about 2". This will allow the tops of your brused to have a little more protection while traveling.
Sorry this isn't very well lit. My sewing room has a total amount of 0 natural light so the lighting is less than ideal.
Sew the top of the fold about 1/4" in.
Fill 'er up with your brushes. I don't have enough to fill the whole bag {umm...why?} so I spread 'em out a little!
Roll it up and tie it with a bow or sailors knot. There you have it! :) Safe travels for the brushes!
If you have any questions, or need something further explained please email me!!
theordinarywifeblog{at}gmail{dot}com
This might be a perfect project for our Homemade Craft Swap! Check it out!


Wow! I love tutorials like this. CUTE fabric.
ReplyDeleteCarolyn
Thanks! :) I made some pillows out of this fabric and had some left over! :)
DeleteThis is such a great idea and your tutorial is so easy to follow! :)
ReplyDeleteDanielle, it's such a wonderful brush case! I want it!
ReplyDeleteThanks so much for sharing this at The DIY Dreamer.. From Dream To Reality!